There are endless possibilities when crafting with paper. I believe that it's all about learning how to put those possibilities together in a way that will make someone smile. Follow my blog and maybe together we can inspire and learn a little something new. Share your tips and tricks along the way when you leave a comment on a related post. Thanks for visiting and don't forget to follow me.

Wednesday, April 29, 2015

Mother's Day


In case time has gotten away from you, Mother's Day is just around the corner.  About a week ago I was browsing the SIL store and purchased a card file that I wasn't overly thrilled about but I thought if nothing else I would make it up and send to one of the many "mothers" in my life. Anyways I had been struggling to come up with even a basic card design until last night when I started to cut out this card file. I finally came up with something, and I am just thrilled with how it turned out.


For my family Mother's Day wasn't just a day for mom but it often fell on my grandmothers birthday as it does this year. Although she has past I still long to honor her life, so it was only right to create a card with her in mind. This is a card that will be given to her daughter, my mother. Grandma loved her flower beds and would tend to them regularly allowing her to have fresh flowers in her kitchen all summer long. She was the most AMAZING person and a role model for many. As I put the card together I realized it was missing something, so I grabbed my markers and created the border. I think the border makes it look like "kid's refrigerator art."


The surfer on this card stock makes the perfect gardner!  I was lucky to have the perfect background in this paper stack that I had purchases on clearance this last winter. Also used in this project are three Prima flowers that I had purchased off eBay and then my Spectrum Noir markers. The sentiment "Amazing" was stamped and heat embossed, giving it a glossy shine. 


And in case  you are wondering my mother doesn't frequent the Internet so it's unlikely that she will see this post prior to receiving her card. Now off to find some more inspiration for a few of the other mothers in my life. 
Sunday, April 26, 2015

"Construction Zone" Kids Birthday Party


Birthday parties are fun for the little ones, and for me it is fun to see it all come together. It's especially enjoyable when I am able to create decorations that match the choosen theme. This post will display some of the items I put together for a constuction zone themed party. 

 Our construction worker is what I like to call a layered paper doll, his name is Emmet. I obtained the Emmet file by completing a Lego themed blog hop with SVG Cutting Files the cutting file for Emmet is not an item for sale.  The do not pass , fun ahead and pit stop signs were all purchased from the SIL store. The proceed with caution sign was made using the fun ahead sign, I deleted the text and replaced it with what is shown in the picture. 


Please excuse the backdrop for the banner photos, I just simply don't have an area suitable for taking photos of larger items. These banners were made using the work zone banner flag kit.  The top banner is what is sold in the kit and then on the personalized name banner I only used the kit for the flag shapes. I like to do a personlized banner as the child can then have it for their bedroom, playroom area, or recyle it for future parties thrown in their honor. 


Last but not least my favorite part of this party package was the favor box. The tool box is a perfect size for fitting candies along with other small goodies for the guest. The thank you sign was one that I had drawn up and printed. There are several other signs, some invitiations and boxes that would all work well with this theme available in the SIL store. 


Wednesday, April 22, 2015

Making Your Own Enameand l Dots


Before
After

Here is the tutorial I promised you on how to make your own enamel dots. This process can be a bit time consuming, but it's totally worth it in the end. The dots that I made were done using Ikea's pyssla beads you get over 1lb of beads for $5.99, that's a price you can't beat considering you can pay $5.99 for a sheet of  only 60 enamel dots all of the same color.   Pyssla beads are very much like perler beads.  Perler beads are the ones that you place on peg boards to create a design and then melt with a hot iron, they are great for entertaining tweens. In addition to perler beads I have seen crafters make enamel dots using pony beads. 

You will need a cookie sheet, parchment paper and the beads you've selected to use. As you pre-heat your oven line your cookie sheet with parchment paper and lay out your beads. Laying out your beads can be time consuming especially if you are using small perler beads. The beads must be layed out so that they are standing up, leaving enough space for them to double in diameter as they melt. 

For pony beads set your oven at 425 and allow 8-15 minutes for the beads to melt evenly. 
For perler beads set your oven at 275 and allow 30-40 minutes for the beads to melt evenly. 

In the process of doing this I found that some colors took longer to melt. In the pictures (sorry they are not great pictures) you see the second pan that I did and it contains all the colors that seemed to take longer. You do have to watch the beads as they can burn, so don't walk away from your oven during this time be sure that you are checking them ever 5 minutes or so. There are many tutorials available on YouTube  

Saturday, April 18, 2015

Spring Tree Gate Fold Card


I had seen this card being made by several on a FB page that I follow, and just loved the idea of it so I had to make my own.  Although it's creator has named it Spring Tree Gate Fold Card, with the fresh floral blooms I prefer to think if it as the Tree of Life as this card is fitting for many occasions. I just love the color combination that I put together as well, I just wish I had known to save the paper pack cover so I could tell you the shadges of green. 

Wednesday, April 15, 2015

This past Valentines Day...


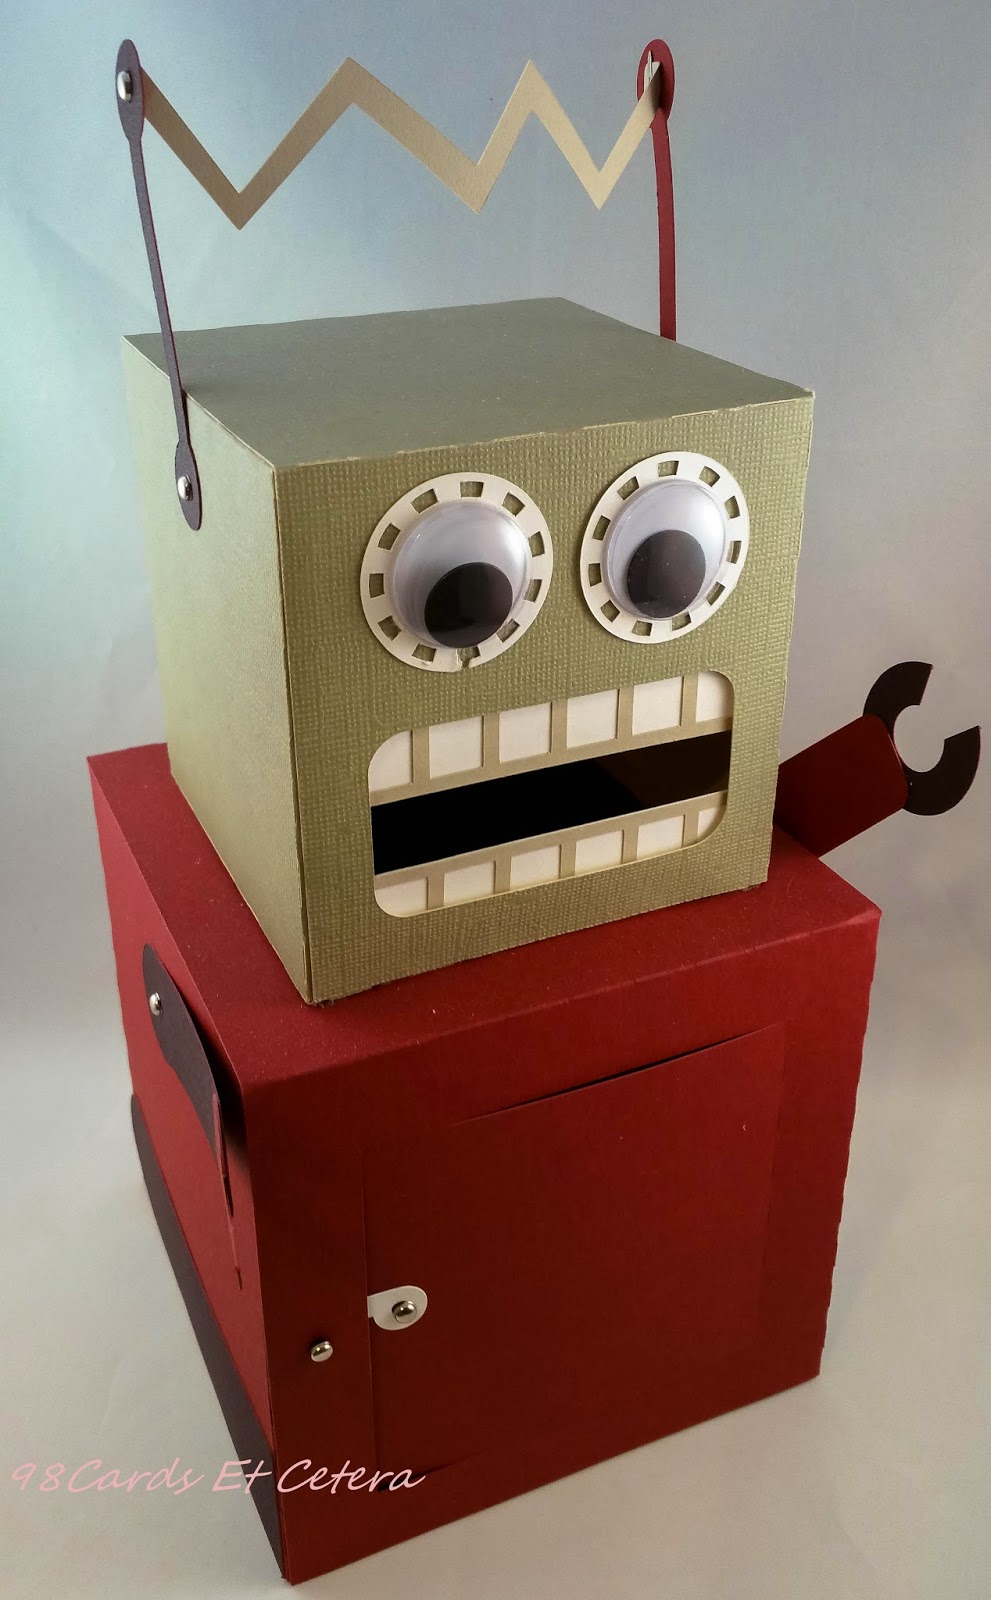
This past Valentines Day I wanted to make a little something for my son, who I will refer to as "Flyer" becuase he is always flying through this house. I made this cute robot mailbox for him to receive Valentines at home. As you can see I kept it pretty basic no desinger papers, just added the googly eyes.  The mouth is open and drops items into the bottom box, and the belly of the robot opens allowing you to retrieve the mail. It's a cute quick project that would work great as a birthday center piece or decor in your childs playroom or bedroom.


Knowing that I wasn't going to receive any flowers or chocolates for Valentines day, I decided to make myself a box of roses. Here I have a dozen roses in the form of a large box card. This box card will fold flat to allow for storage or shipping. 

Both of this projects were made using files from the SIL store. 

Friday, April 10, 2015

Words of Comfort


Whether you pray to God or another object of worship, the phrase "Praying for you" is commonly used when comforting another being. Here is a set of simple cards to let others know that we are thinking of them and praying in their time of need. 


This card design is available in the SIL store and is listed as design #61999. The file does not include the four corner dots, in each corner I added an enamel dot. I made the dots using Pyssla beads that I had purchased at Ikea, this are also known as pearler beads.  I will try and post a brief tutorial on how to make your own enamel dots in the near future.  

Sunday, April 5, 2015

Easter Morning!


Many children woke up today to fin that all sorts of edible bunny's had been left for them to enjoy.  Instead of hopping on the bunny bandwagon this year, I whipped up this adorable owl treat box.  You can't tell here but the owl is double sided. 


I wanted to do something a little different to embellish my owl, so I turned to my drawer of washi tape as I have been wanting to try cutting it with my Cameo.  I applied the tape to a piece of white card stock that I had pulled out of my scrape drawer and it worked perfectly. I think this is reason enough to start building up my washi tape supplies. 

Happy Easter!


Wednesday, April 1, 2015

Mini Photo Album


Happy Hump Day! I was looking for a quick project the other day and come across this mini album. I have had some pictures that I have been meaning to print and send out to a relative, this was the perfect push to finally get that done.  This album comes with eight pockets, intended to be used for photos or life cards and measure 4"x 6".


I completed the eight pockets placing two photo's in each one. You could easily add more pockets to fit your need as there is plenty of room to do so using the given binding. Without using too much dimension the front of the first pocket would be an ideal space to add embellishments or an album title.


The album cut file also includes a storage box. The box does require 12" x 12" paper, I used a heavy  printed cardstock by Darice. The pockets for the album each require 8.5" x 11" cardstock.  The creator of the file is Lori Whitlock and she has provided a great tutorial on assembly.